by Kei Michisaki
About five years ago, I was staring down at a pile of eye-catching trinkets I’d collected from the beach: shells, rocks, chunks of dried coral, sticks and leaves. I wanted to turn them into a present for my little sister. So I took some hemp string, beads, feathers and freshly cut vines, added them to my ocean treasures, and made my first dreamcatcher.
Creating dreamcatchers has since become one of my favorite crafts. Teaching others how to maneuver string, beads and a stick into a beautiful dreamcatcher has become a hobby. Not only are the things eye-catching, they are also a symbol of protection in the spirit world.
Dreamcatchers are an American Indian tradition, from the Ojibway (Chippewa) tribe. Creators would spin sinew strands into a web around a small, round or tear-shaped frame. Their dreamcatchers were then hung in a sleeping area as a charm, to affect the sleeper’s dreams. The legend is that the bad dreams will get caught in the dreamcatcher’s web, dying in the sunlight when morning comes. Traditionally, Native American dreamcatchers are about the size of one’s hand, made of bent wood and sinew string with a feather hanging from the web or hoop.
Today you’ll often see dreamcatchers made with sturdier string and decorated with colors, beads and feathers. In the 60’s and 70’s the Ojibway dreamcatchers started to gain popularity in the across the country. Other Native American tribes, like the Cherokee, Chumash and Navajo now create dreamcatchers as well. Today you see them hanging in lots of places other than sleeping areas, like living room windows and rearview mirrors.
The popularity of dreamcatcher charms has grown dramatically over the years. They can now be bought as rings, tattoos or paintings. Businesses have started manufacturing dreamcatchers to be sold and bought in gift shops. In pop culture the meaning behind a dreamcatcher has vanished. It is seen as a cool object rather than a protection charm, but either way, nothing beats making your own.
How to make your own dreamcatcher
Â
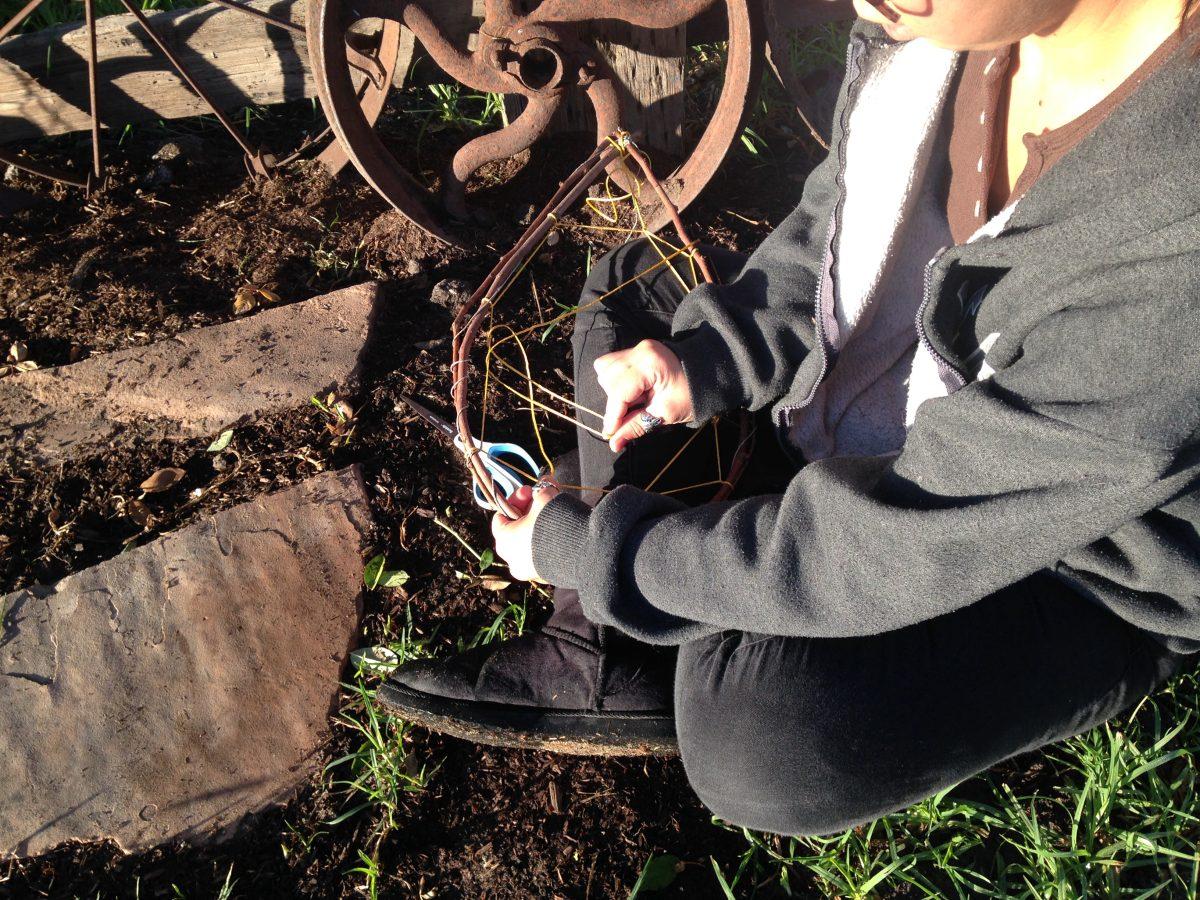
- Start with a length of fresh cut vine about 2 to 6 feet long. Red willow or grapevine from a local winery works for making the hoop. Carefully bend the vine around to form a circle and tie the ends together. The vine will be easier to twist into a circle and tie when it is freshly picked. Â It will become brittle as it ages.
- If you are using a thin vine, twist it around in a hoop twice for strength. To make your hoop sturdier, wrap a strip of leather or cord all the way around the edge of the hoop. This can merely be a decoration.
- Use a long piece of strong but thin string, about 5 to 16 feet. The exact length of the string is determined by the diameter of the hoop. Hemp string works great for the average crafter; traditionally, intestines softened with water were used.
- Fasten a loop from one end of your string around the top of your dreamcatcher or at the weakest point of your hoop. This will let you hang the dreamcatcher when finished.
- The same stitch is used to make the web from start to finish. Begin by holding the string attached by the loop at the top and loosely wrap it around the hoop to the right. When wrapping, move the string around to the back of the hoop, forming a hole, and pull the string through the hole you just made.
- Pull each stitch taught. When pulled tight, the stitch will keep the string in place. Be careful not to pull too tight or it will warp the hoop of the dreamcatcher and it will not lie flat when it is done.
- Continue the same stitch all the way around the hoop of the dreamcatcher. Space the stitches evenly, about 1 to 2 inches apart.
- The last stitch of the first round should be placed about a half inch away from the the hanging loop.
- On the second and subsequent stitching rounds, place the string around the center of each section of string created from the previous round rather than around the hoop.
- As you pull each stitch tight, the string will bend toward the center of the hoop slightly, forming a diamond shape. You should see the web beginning to form.
- On the third or fourth round, add a bead, shell, rock or another kind of small trinket. Simply place the bead on your string and continue stitching around.
- Stitch toward the center of the hoop. Eventually, the string between the stitches will be so small that it will be difficult to pass the string through. Leave a hole in the center of the dreamcatcher for the dreams created by good spirits to pass through.
- At the bottom of the hole in the center of the dreamcatcher, end by stitching twice in the same place to form a knot. Make sure to fasten the string securely so the web does not unravel.
- You should have leftover string to tie feathers and beads to dangle from the center of the dreamcatcher, if desired.
- Take a length of string to dangle from the bottom of the dreamcatcher, decorated with small trinkets and feathers. Tie the middle of the string to the dreamcatcher so there are two individual strands that hang down.
- Hang the dreamcatcher near a sleeping place or enjoy as a beautiful handmade gift. Sweet dreams!


